Add table of contents for a fast browsing experience
Let users navigate faster between sections of the publication with a table of contents. Usually this is also present in the .pdf pages but putting it in the navigation menu will be even more ergonomic and user friendly. Let’s walk you through the process
1) To enable the table of contents feature, first select your publication from the list.
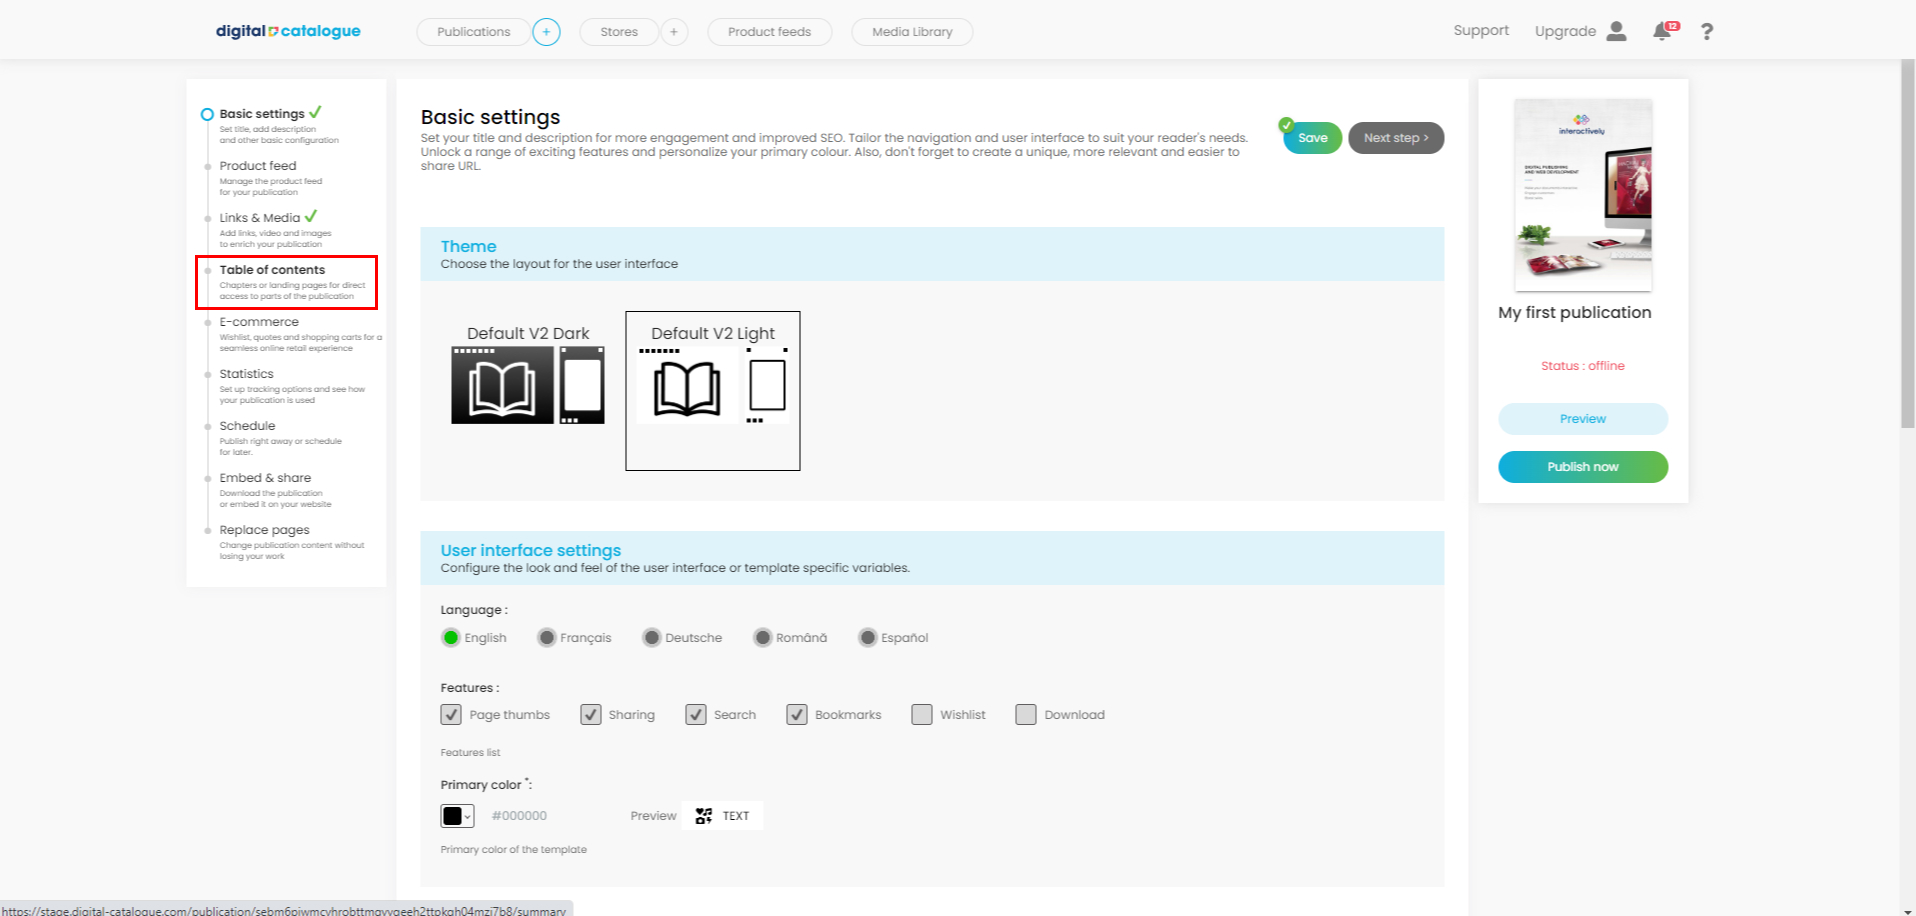
2) Choose <Table of contents> from the left side menu of the publication editor

3) Enable the feature by toggling the button “Click to enable”

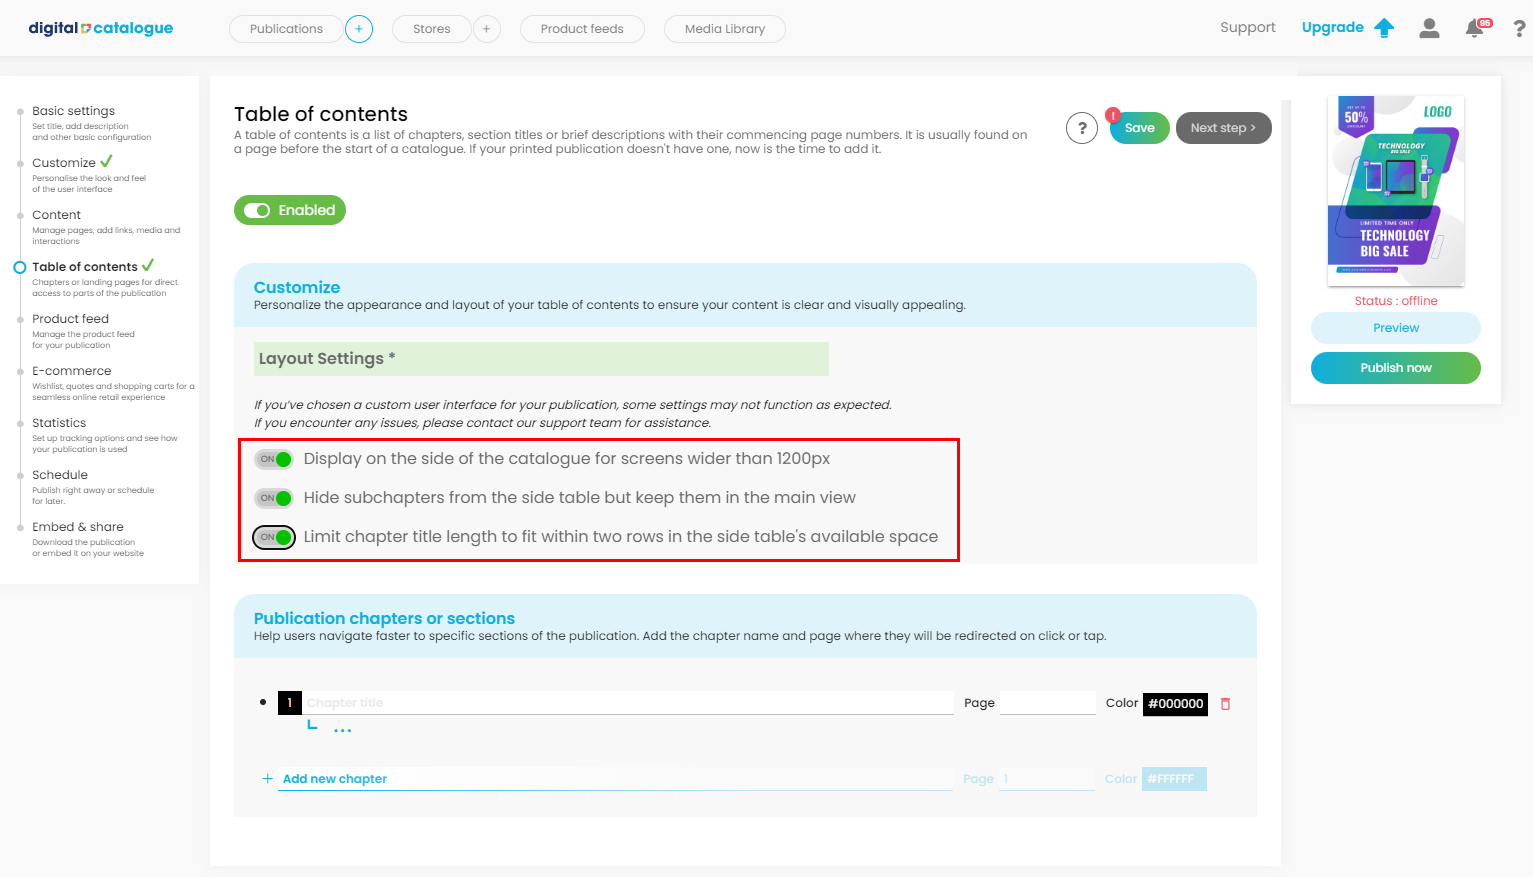
4) Customize your table of contents

Personalize the appearance and layout of your table of contents to ensure your content is clear and visually appealing. ● Enhance navigation with a side catalogue that appears on screens wider than 1200px, offering users easy access to sections and improving overall usability. ● Simplify the side table by hiding subchapters, while ensuring they remain accessible in the main view for a cleaner and more focused browsing experience. ● Ensure chapter titles in the side table are concise, fitting within two rows, to maintain a neat and organized layout without truncating essential information.
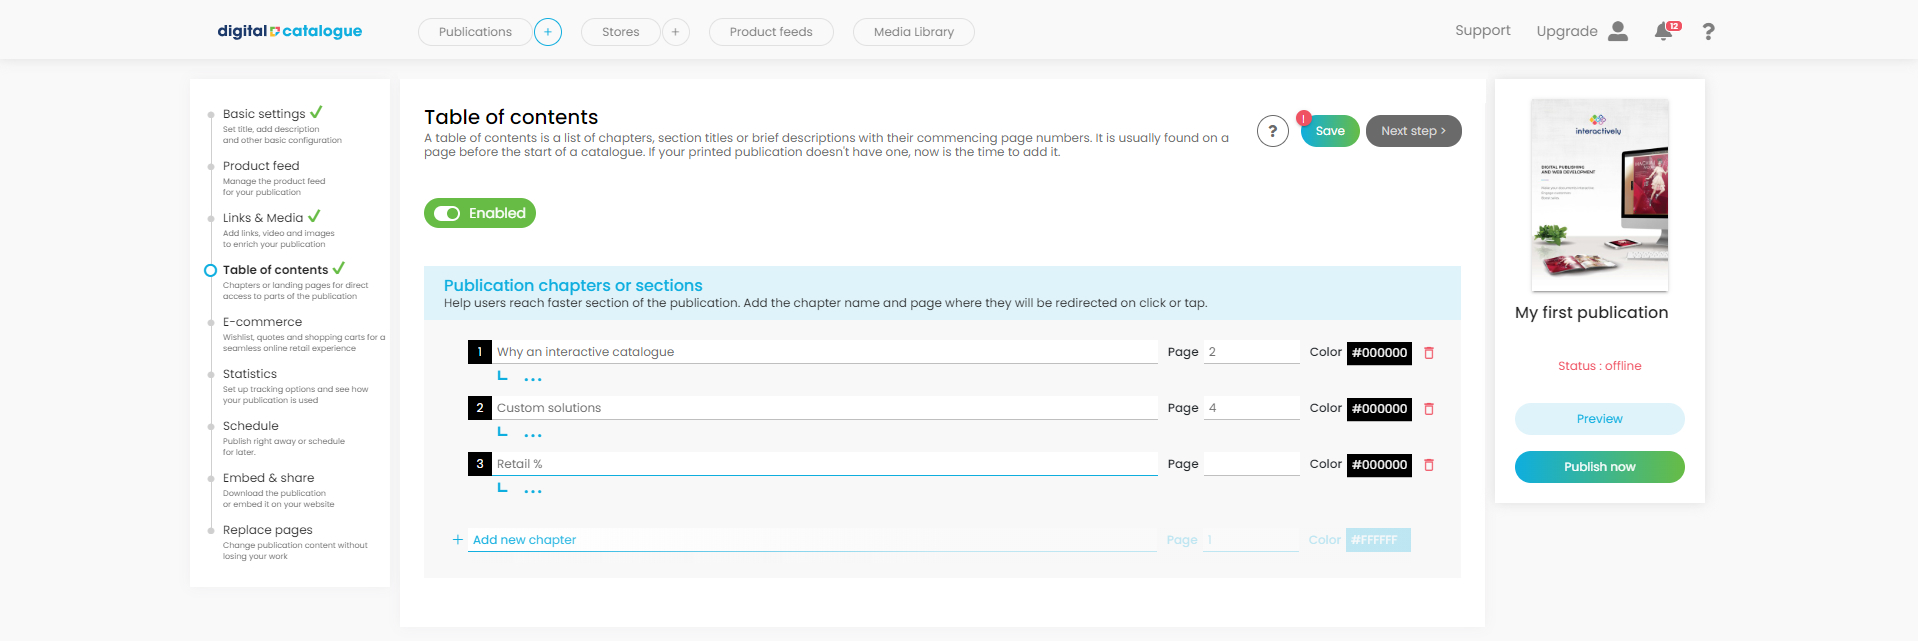
5) Add chapter by chapter, by indicating the page to which the reader should be redirected

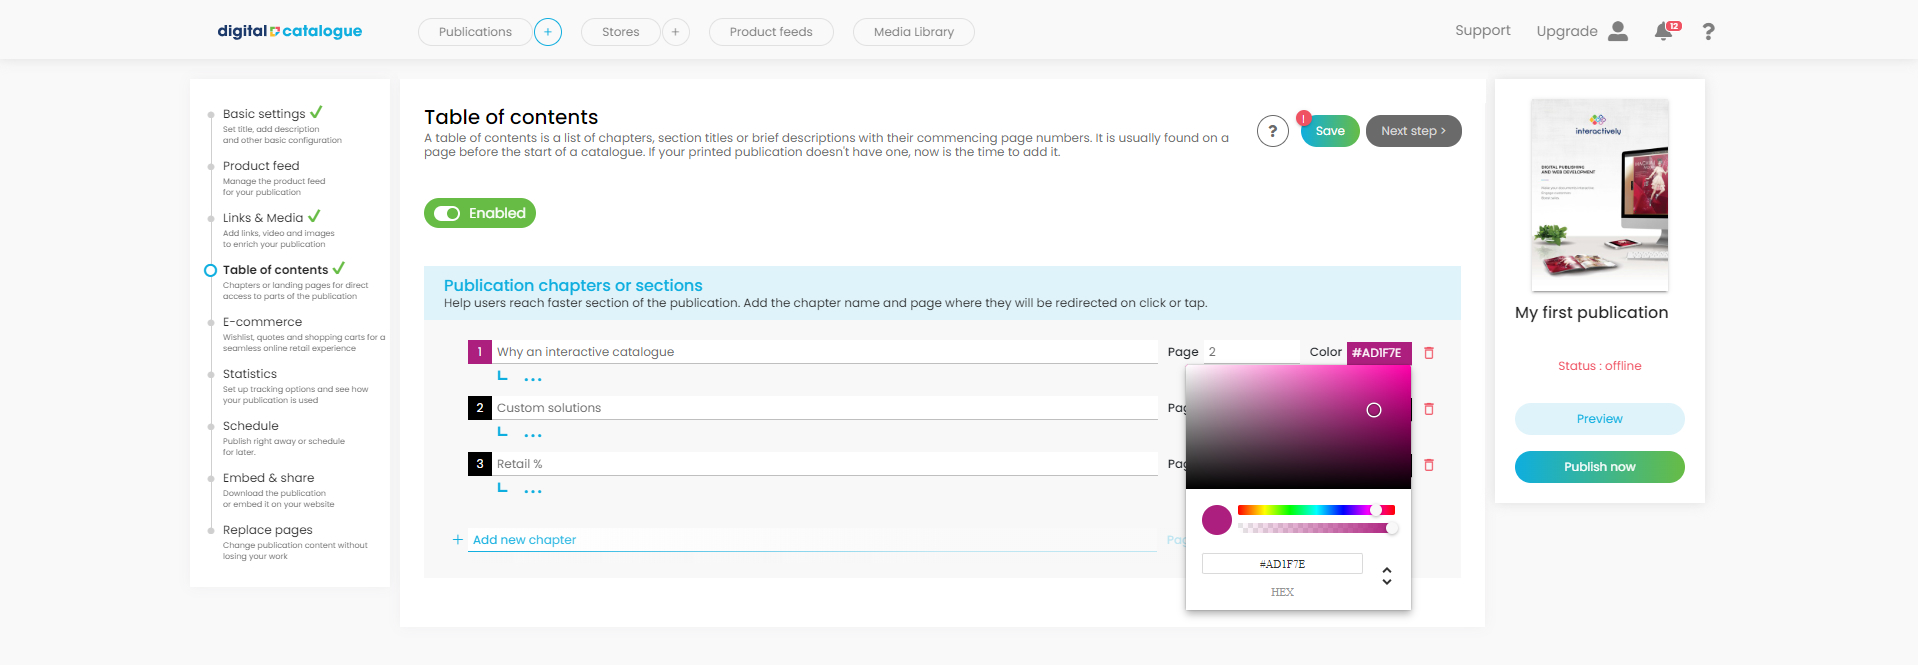
6) (OPTIONAL) If you what, you can personalize each chapter’s color by specifying the color code or using the color picker

7) Save the table of contents and now inspect the result by clicking on the “preview” button from the right side menu.
8) The table of contents button is now present in the navigation menu
9) Click on it and the chapters will show up.
