How to enable a Product Gallery in your Digital Catalogue
The Product Gallery allows you to showcase all your products in a visual, interactive format, complete with filters to help users quickly find what they’re looking for. This tutorial will guide you through connecting your data and setting up the gallery.
1. Create and Connect your publication to a Data Source
The Product Gallery relies on a Data Source, which is typically a CSV feed containing your product information. Each product in the CSV can include details such as:
-
Category – Useful for grouping similar products.
-
Brand – Allows users to filter products by brand.
-
Size and Colour – Optional fields, ideal if applicable to your products.
When you upload your CSV file to create a Data Source:
-
Go to the Data Source section of your platform.
-
Click Upload CSV.
-
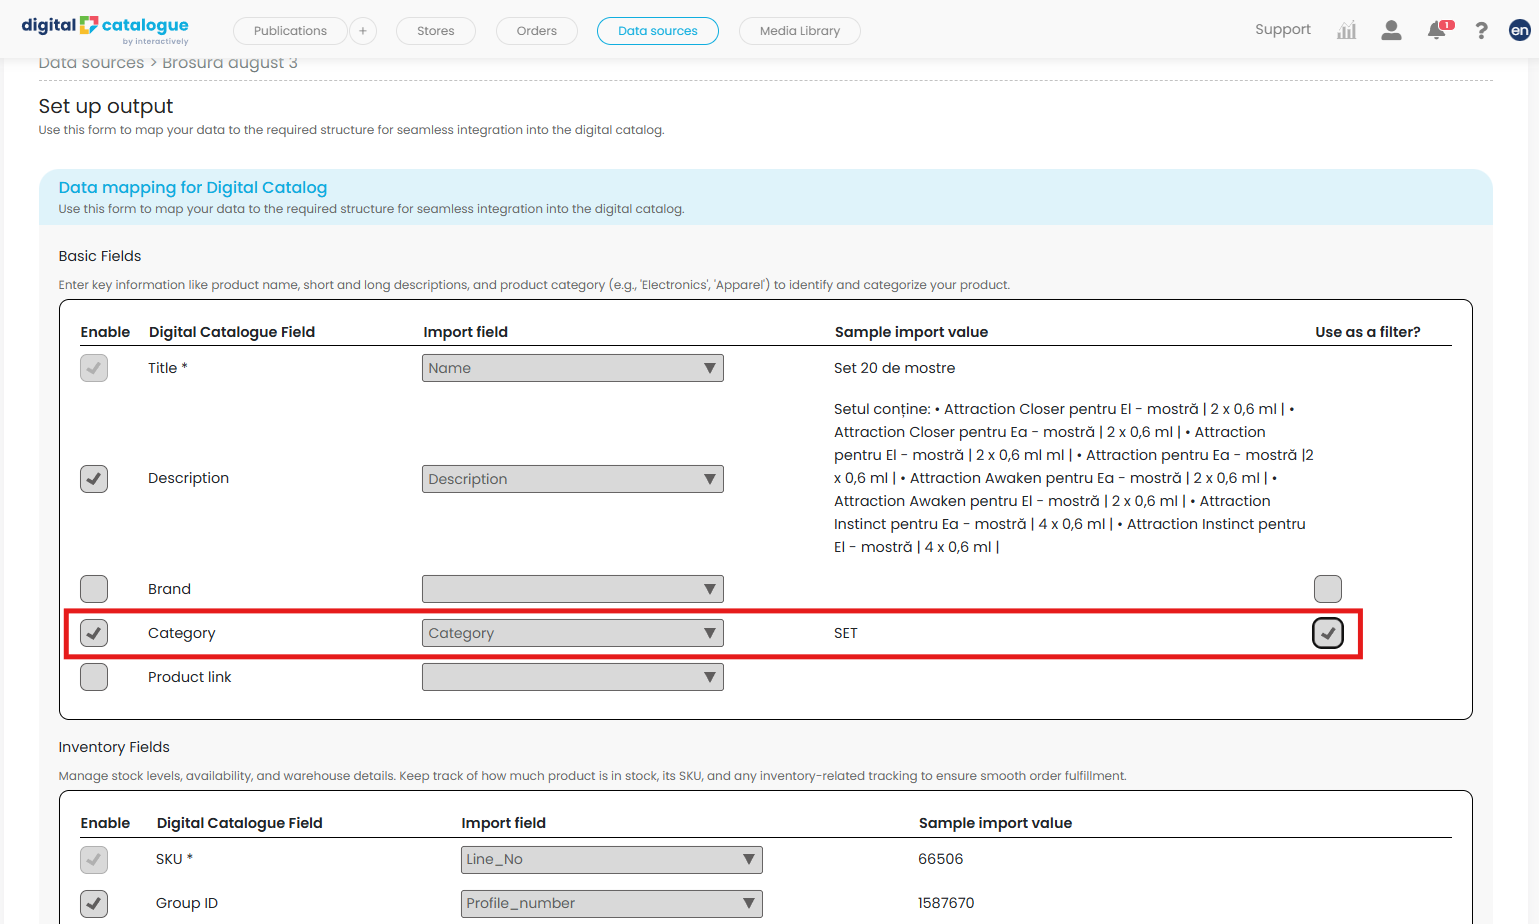
Go to Set up Output and map the CSV columns to the corresponding product attributes.
-
Enable filters: Make sure fields like Category, Brand, Size, and Colour (if applicable) are correctly mapped if you want them included in the Product Gallery filters. To do this, tick the Use as a filter checkbox on the right.
-
-
Save and confirm the Data Source.
⇒Tip: Including as many relevant attributes as possible improves the usability of the Product Gallery and allows your users to filter and browse more efficiently.
2. Set Up the Product Gallery in Your Publication
Once your Data Source is ready:
-
Open your publication.
-
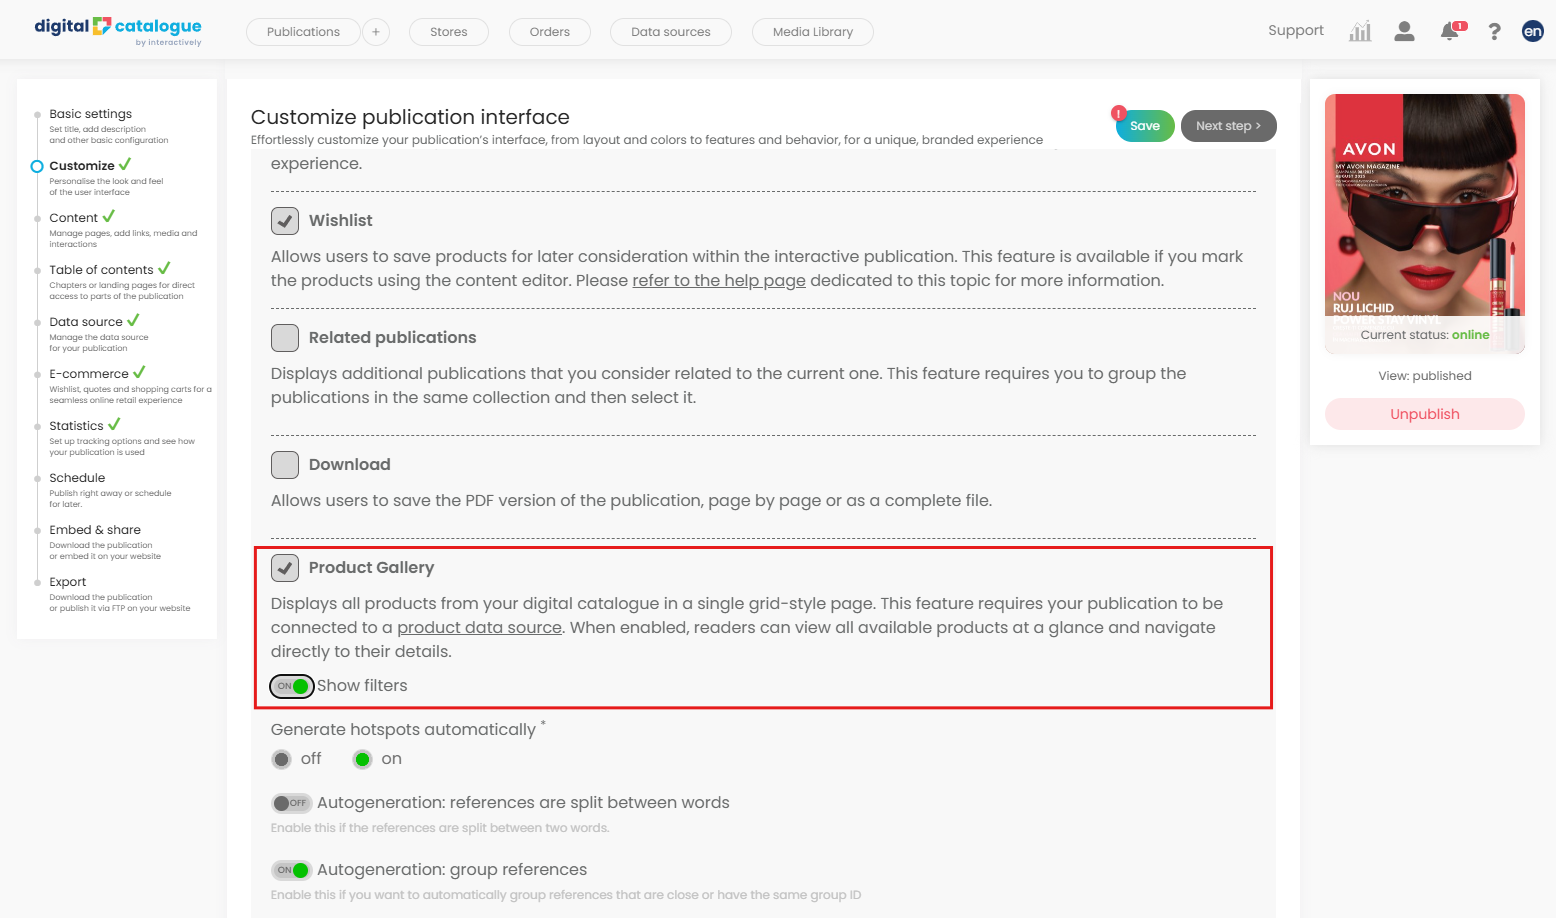
Go to the Customize section.
-
Tick the Product Gallery feature to enable it.
-
Toggle Show filters on to make the filter options visible in the gallery.
-
Ensure the correct Data Source is connected to your publication.
-
Save your changes.
You are all set up! Check your digital catalogue in preview mode to explore your new Product Gallery feature and see how your products can now be browsed and filtered with ease.