Create and set up a Store
A store serves as a centralized hub where you can manage the checkout information for your Digital Catalogues.
If you don't have an existing online store or e-commerce website, our platform offers e-commerce features to help you sell your products directly through your Digital Catalogues.
By creating a dedicated store, you can enjoy benefits such as increased sales, enhanced customer experience and streamlined order management.
The available features may vary depending on your current licence.
How to create and set up a Store.
1) The Store feature is available on the top menu. To create a store click on the "plus" icon.

2) Fill in the necessary information to set up your store.
Provide the basic information that will be used in forms and communications sent to your customers. Enter a store name for easy identification and one or multiple email addresses to receive notifications. These notifications will help you manage internal administrative tasks efficiently. Separate email addresses with a comma.

3) Choose the currency your store will use for pricing, transactions, and customer payments.

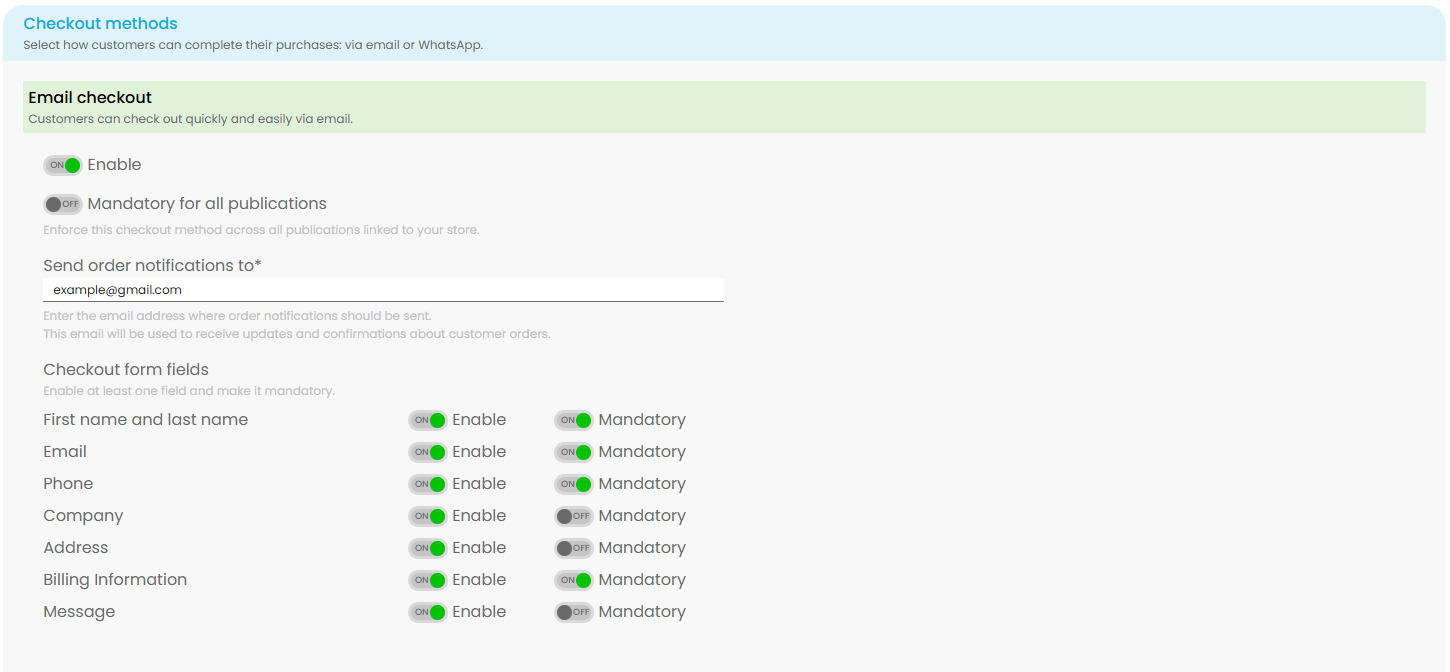
4) Enable checkout methods: Email and/or WhatsApp.
Enable quick and convenient e-mail checkout for your customers. Enter one or multiple email addresses to receive notifications when new orders are placed in your Digital Catalogue. Separate email addresses using a comma. Remember to configure the checkout form fields in your Digital Catalogue to streamline the process.
Enable seamless and efficient checkout through WhatsApp for your customers. Enter the recipient's phone number and orders will be directed to that specific contact. Leave the input blank to allow customers to add the phone number themselves.

If Customize WhatsApp Order Confirmation is toggled on, you can personalize the confirmation message sent to customers along with the offer. Keep in mind that very long messages—especially for large orders—may be truncated by WhatsApp, with the item list potentially cut off. To ensure customers see all details, keep the message concise and include a link to the full order.
Use these dynamic placeholders to automatically insert order details:
-
:order_items– list of items -
:order_total– total cost -
:order_link– link to view the complete order
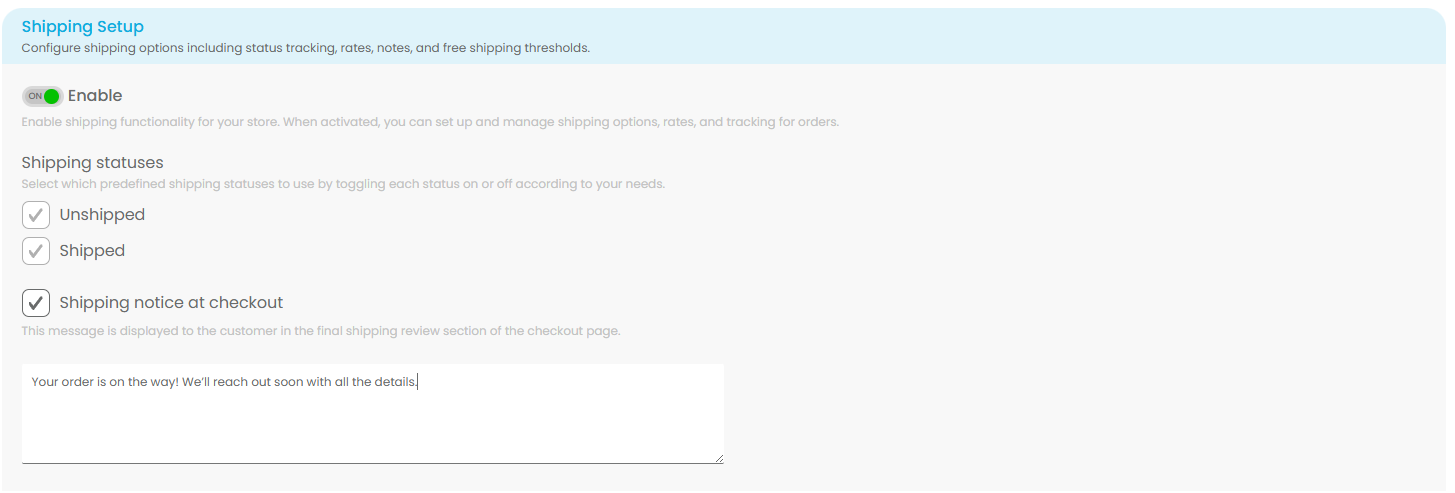
5) Enable shipping functionality for your store.
Activating the shipping feature allows you to manage shipping options and track orders seamlessly. Customize the process by selecting predefined shipping statuses and toggling them on or off based on your specific needs.
Note: Inventory tracking is available only if the Orders functionality is enabled in your account.
When enabled, Shipping Notice at Checkout lets you add a personalized message for each order. This message appears to the customer in the final shipping review section of the checkout page.
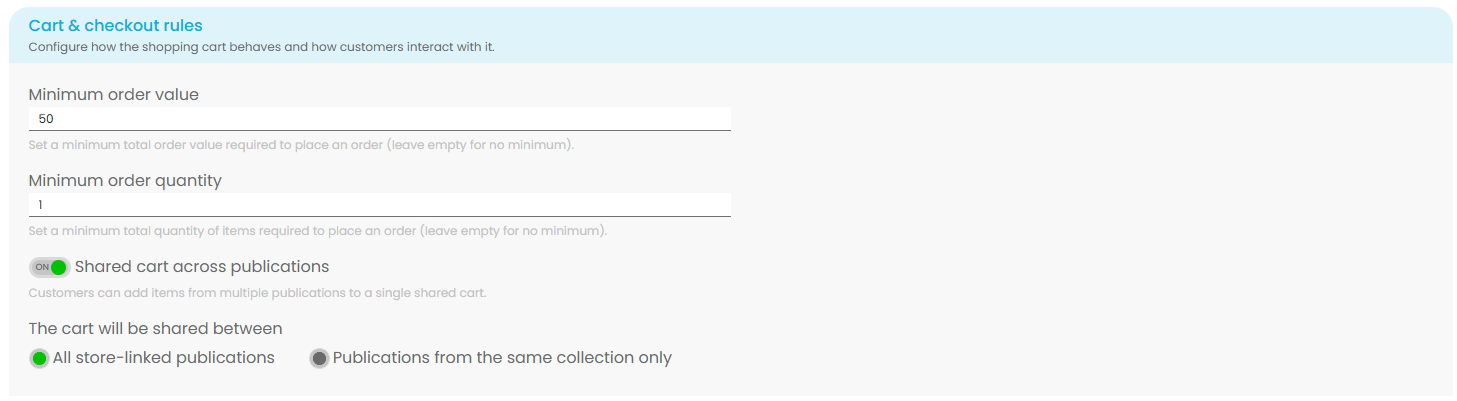
6) Enable Cart & checkout rules
Set rules for how the cart works and how customers place orders. You can require a minimum order value or quantity, and choose whether carts are shared across all store-linked publications or only within the same collection.
7) Enable Inventory tracking
Take full control of your store's stock with inventory tracking. This feature allows you to manage product availability effortlessly and keep customers informed.
Here's what you can do:
- Enable Inventory Tracking:
- Turn on the platform's automatic stock management to track inventory in real-time.
- Allow Backorders:
- Decide if customers can place orders for products that are out of stock.
- Show Stock on Product Page:
- Choose whether to display the current stock levels on your product pages or keep them hidden.
Note: Inventory tracking is available only if the Orders functionality is enabled in your account.
![]()
8) Make sure you save your settings.

Congratulations! Your Store is now fully set up and ready to go.